Scissor Jack Press
This was my first press, I wanted something I could experiment with at home, in between classes. The following shows the steps for making a static press using a car scissor jack:
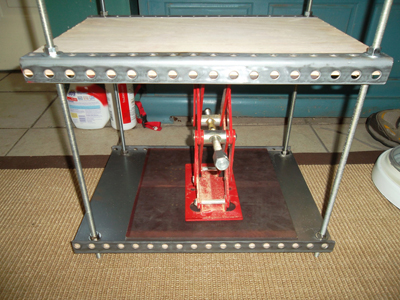
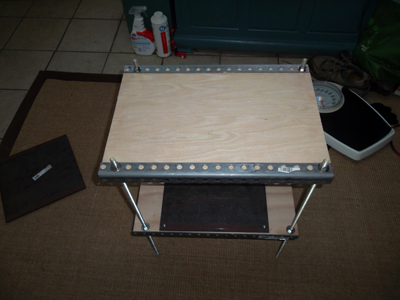
The following is a picture of the finished press.
The following is the list of materials:
Materials- 1.5 ton scissor jack. This I already owned and I think I paid in the $25 to $30 range, Napa Auto Parts. (If I am unable to get a decent images, I will try using a bottle jack. With the current material this press should be able to handle 16,000 lbs before the rods break or the nuts shear. But reality may mean something completely different)
- 2 - 12" x 12" x 0.25" steel welding plates, $30 each at Lowes, Tractor Supply sells them, but they cost more
- 1 - 12" x 18" x 0.08" steel welding plate, $10 at Lowes
- 4 - 24" x 0.375 -16 threaded steel rods, $1.75 each at Lowes (could bump this to 7/16 or 1/2 inch rods)
- 2 - 0.5" drilled steel weldable angles x 36", $9.97 each at Lowes
- 2 - 24" x 24" x 0.75" Oak plywood, 10.00 each at Lowes
- 16 - 0.375 " washers, $0.08 each
- 16 - 0.375" nuts (grade 5) $0.10 each at Lowes
- 4 - Plastic feet, $2.38 (although I replaced these with small blocks of wood with a 5/16 holes drilled in, allowed me to screw them onto the bottoms rods and level the press)
All in all, I spent more than I thought I would for an experiment, so I am hoping I will be able to use it for some printing at home.
Initial Prep work:
- I cut the plywood into 2 - 12.25" x 18.0" pieces, mostly to match the size of the 12" x 18" steel plate
- I cut the 2 steels angles in half so that I had 4 - 18" pieces.
- I drilled 0.5 inch holes in the ends of the plywood pieces to line up with the holes in the steel angles
- I drilled 0.5 inch holes in the 12" x 18" steel plate to line up with the holes in the plywood and angles
- I drilled 0.25" holes in the corners I one of the 12" x 12" steel plates
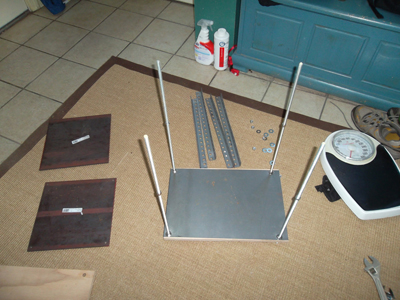
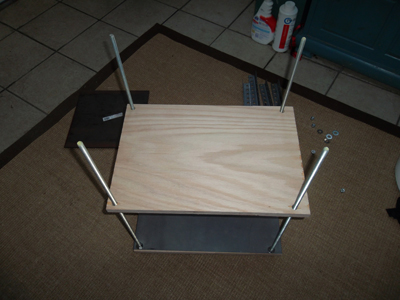
Picture of prepped materials:

I messured the total travel of the press, and then decided I wanted 11 inches of space between the top and bottom plates on the press, on each rod I spun two nuts. 1 inch in on the bottom and 12 inches down from the top. Since the threaded rods are 24 inches there is plenty of space to move things later.
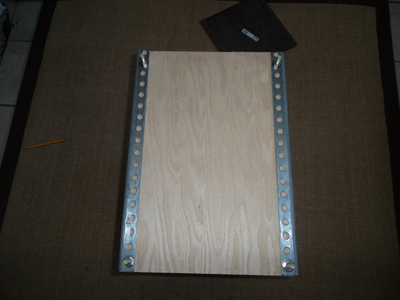
On the bottom ends, slide a washer and then the 12" x 18" steel plate, followed by a piece of the cut oak plywood, followed by 2 of the angled brackets, followed by a washer, followed by a nut, and tighten everthing together. (I forgot the angles, and had to do this step over at the end). So you would have something looking this this:
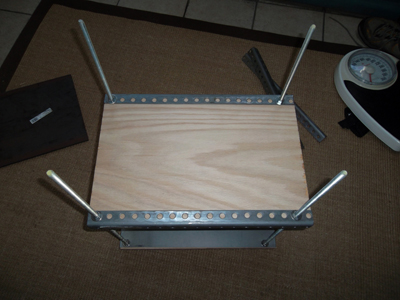
turning this over, you can see the attached angles:
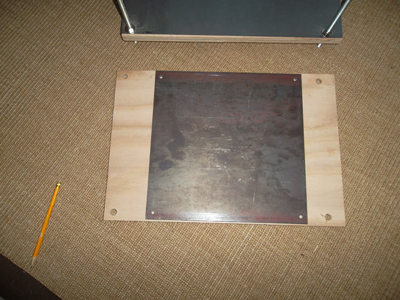
Next, attach the 12" x 12" steel plate that you drilled the holes into, onto the bottom of the top piece of plywood
Slide 4 more washers down the threaded rods, followed by the top plate, make sure the weld plate is facing down.
Next slide on the steel angles, spin a washer and nut down each rod and tighten.
That's it, looking at it upside down, you can see the steel plate attached to the top of the plywood
Attempts to Print
After assembling my press I did some research on the pressures needed to print. For intanglio printing I found 1 person's comments that 700 PSI was needed another person said 2500 PSI. For relief printing I was unable to obtain an answer.
I essentially have 12x12 inch steel plate, which is 144 square inches. So some simple math:
144 x 700 = 100,800 pounds, or 50 tons. Holy Crap. That is not going to happen.
I think I can generate 3000 pounds, and 3000 / 700 = 4.25 psi. So a lot smaller than I thought. So it was time to experiment.
I purchased some inks, and blankets from Daniel Smith (www.danielsmith.com), and attempted some relief and intaglio printing.
The first 2 attempts were some dry point etchings I did on 8x10 pieces of lexan. Almost nothing printed. So 700 psi estimate was looking true. An 8x10 image would require at least 28 tons of pressure.
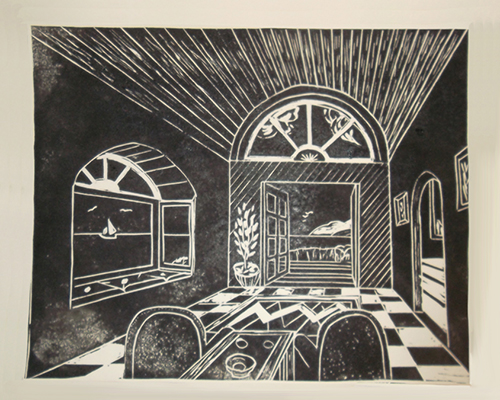
The next experiment was to try some relief printing. I atempted 2 prints of my perspective lino cut image, which is cut into a 9x12 piece of linoleum. I think with practice I might be able to get a decent print, with the right paper, the right amount of ink and pressure and duration. Shown below is the best of the two:
Best Attempt
The next experiment was to try several small drypoint etchings. I used small blocks of wood, the same size as the print, to focus the pressure onto the plate. The first is 4 square inches (2x2), I was able to generate enough pressure. The next 2 were slightly bigger, 2.5 x 3 so there were printed with a little less pressure. The first picture came out the best.
Girl and snowman

Young Girl

Summer Party
So with this current home made press I believe I can use it for relief printing, very small intaglio prints. I have also been using it to glue the lino sheets to a wood backing, so it was been working well as a glueing clamp.
In the future I would like to take some classes in Book Arts, so this press may come in handy for that.